With the enforePOS online presence, you can allow your customers to reserve an appointment for a service such as a perm or a haircut. In this How-To, we'll show you how to accept online service reservations, check in the reservation, and check out when the service is complete.
Learn how to create, check in and check out service reservations for your walk-in customers or for incoming service reservations via phone or email here.
Requirements
Your customers can reserve a service at an available time via your online presence.
If you request a reconfirmation for your reservations, the customer who wants to reserve the appointment will receive an email or SMS asking for a reconfirmation.
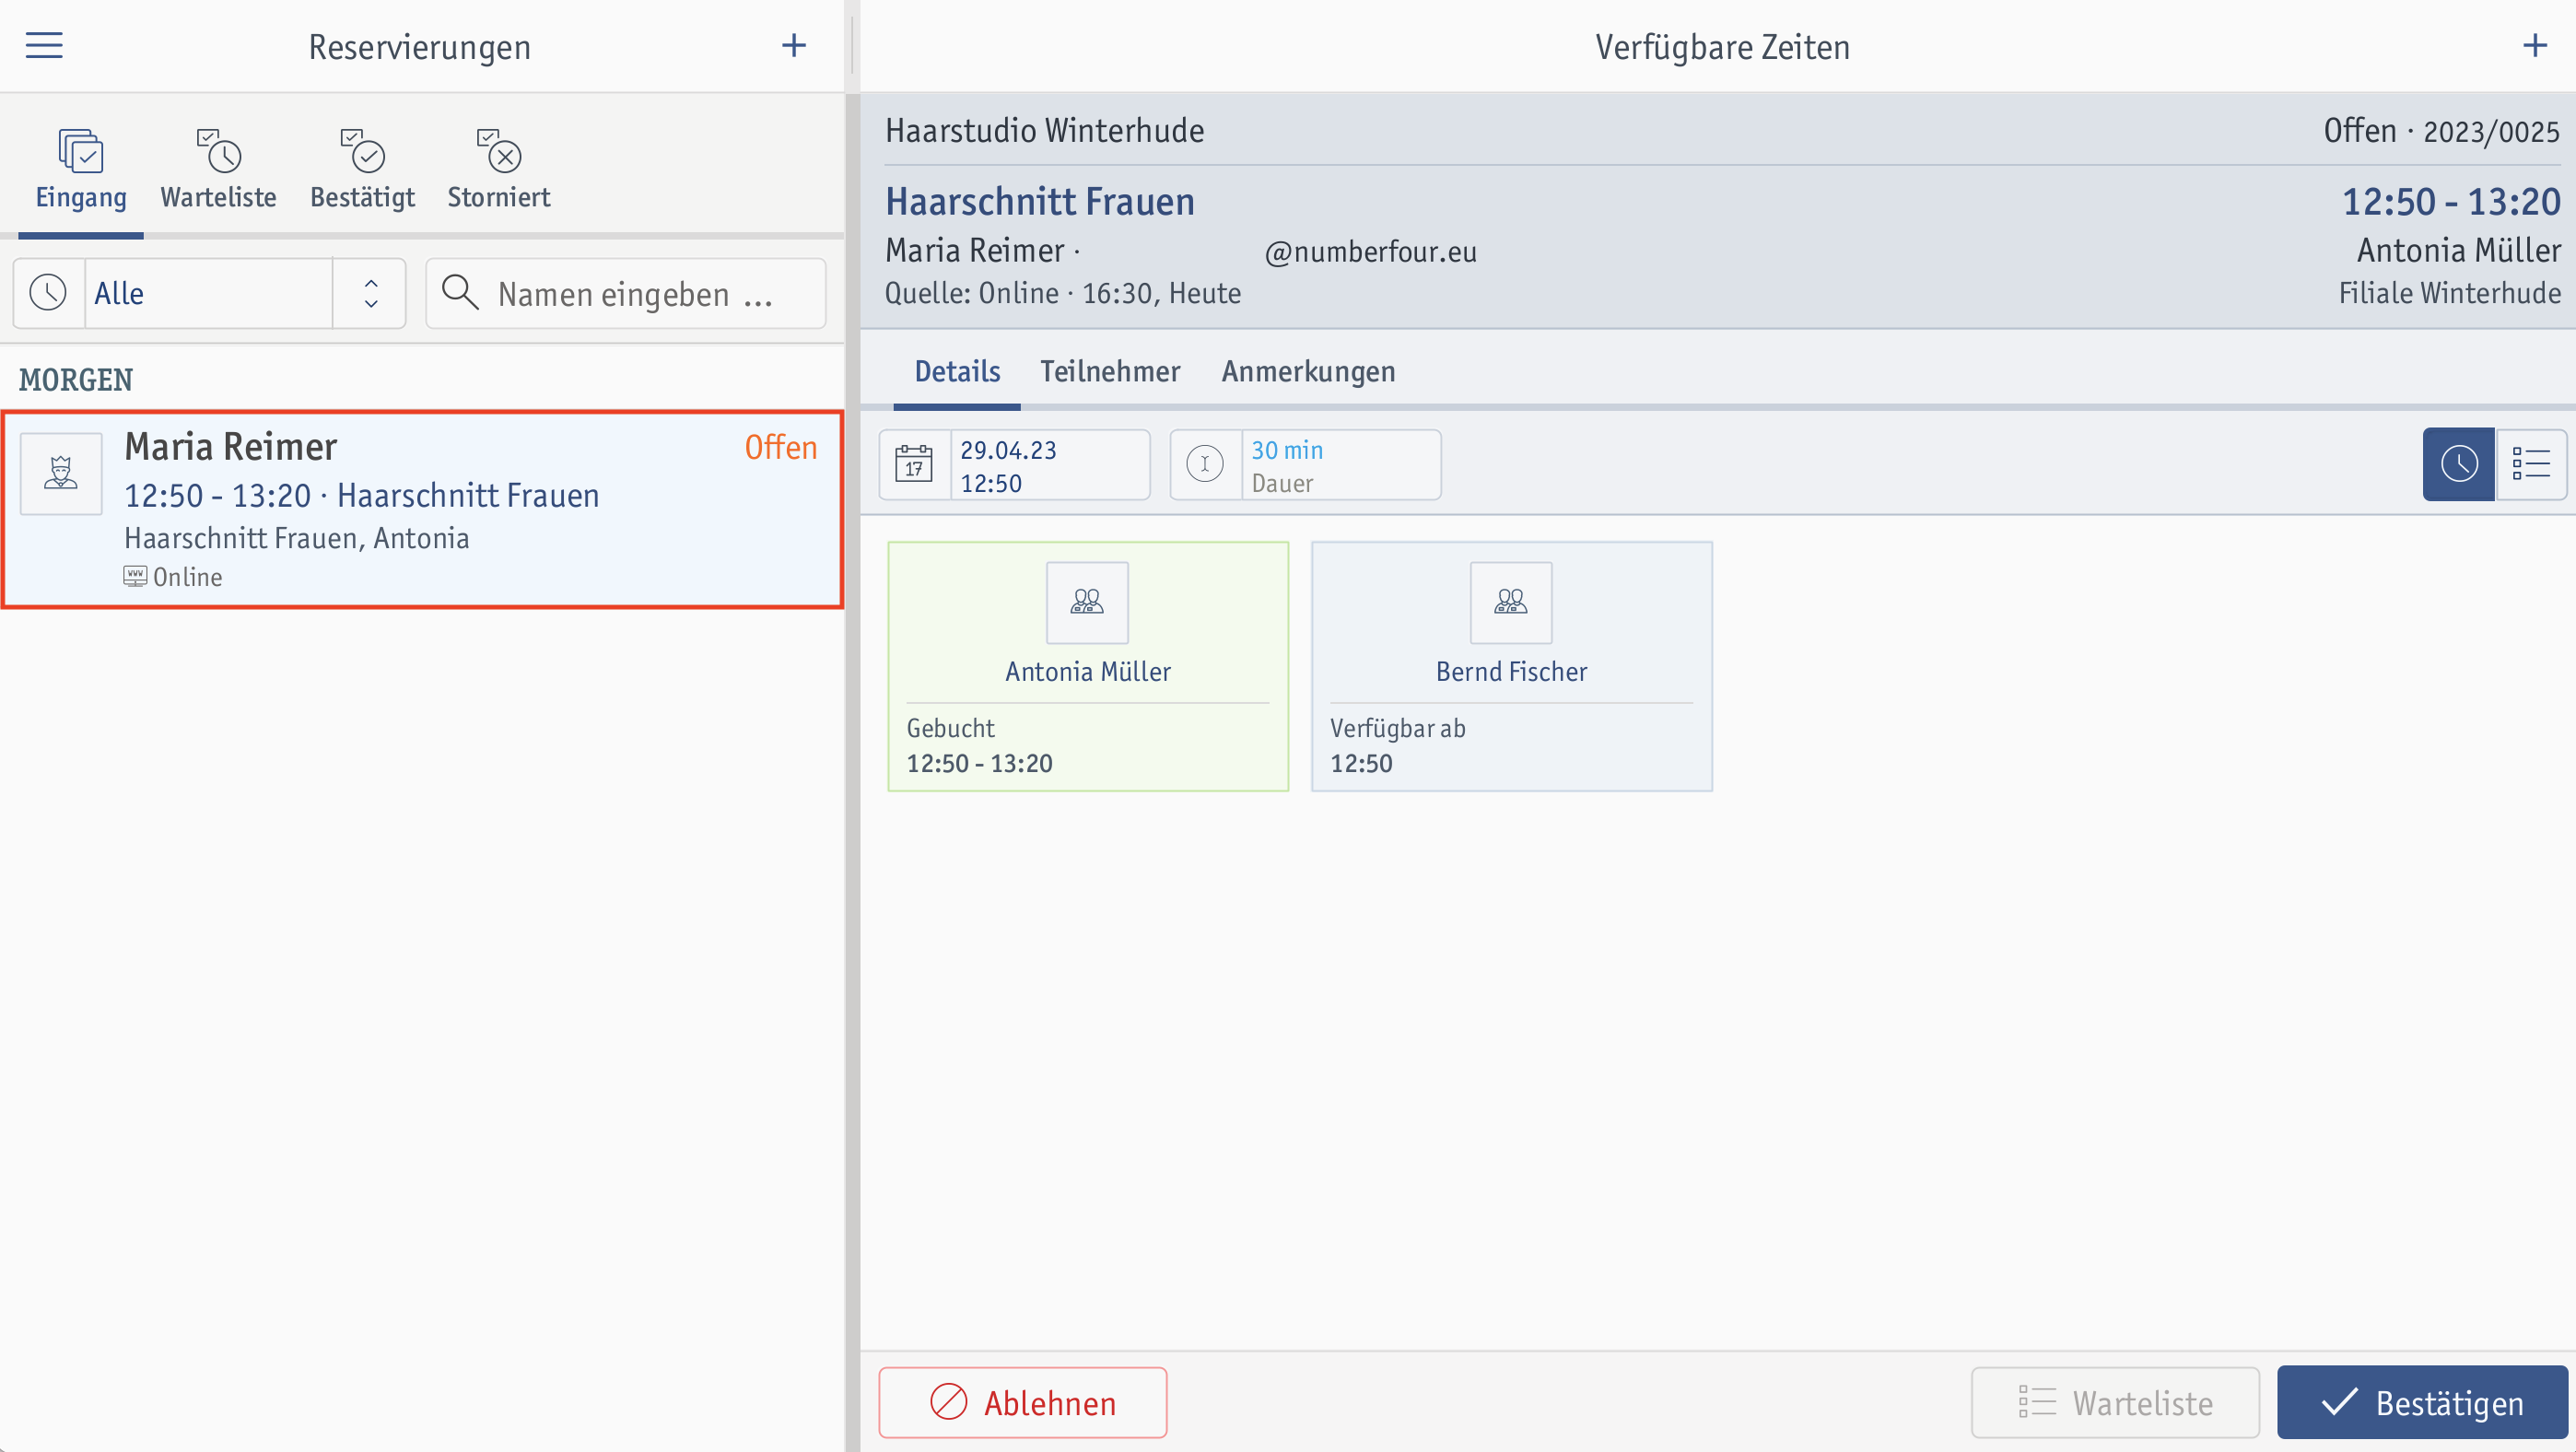
If you have enabled the Reservation must be confirmed option in the Service Reservation module, and therefore your reservations must be confirmed manually, these reservations will be displayed in the Inbox area.
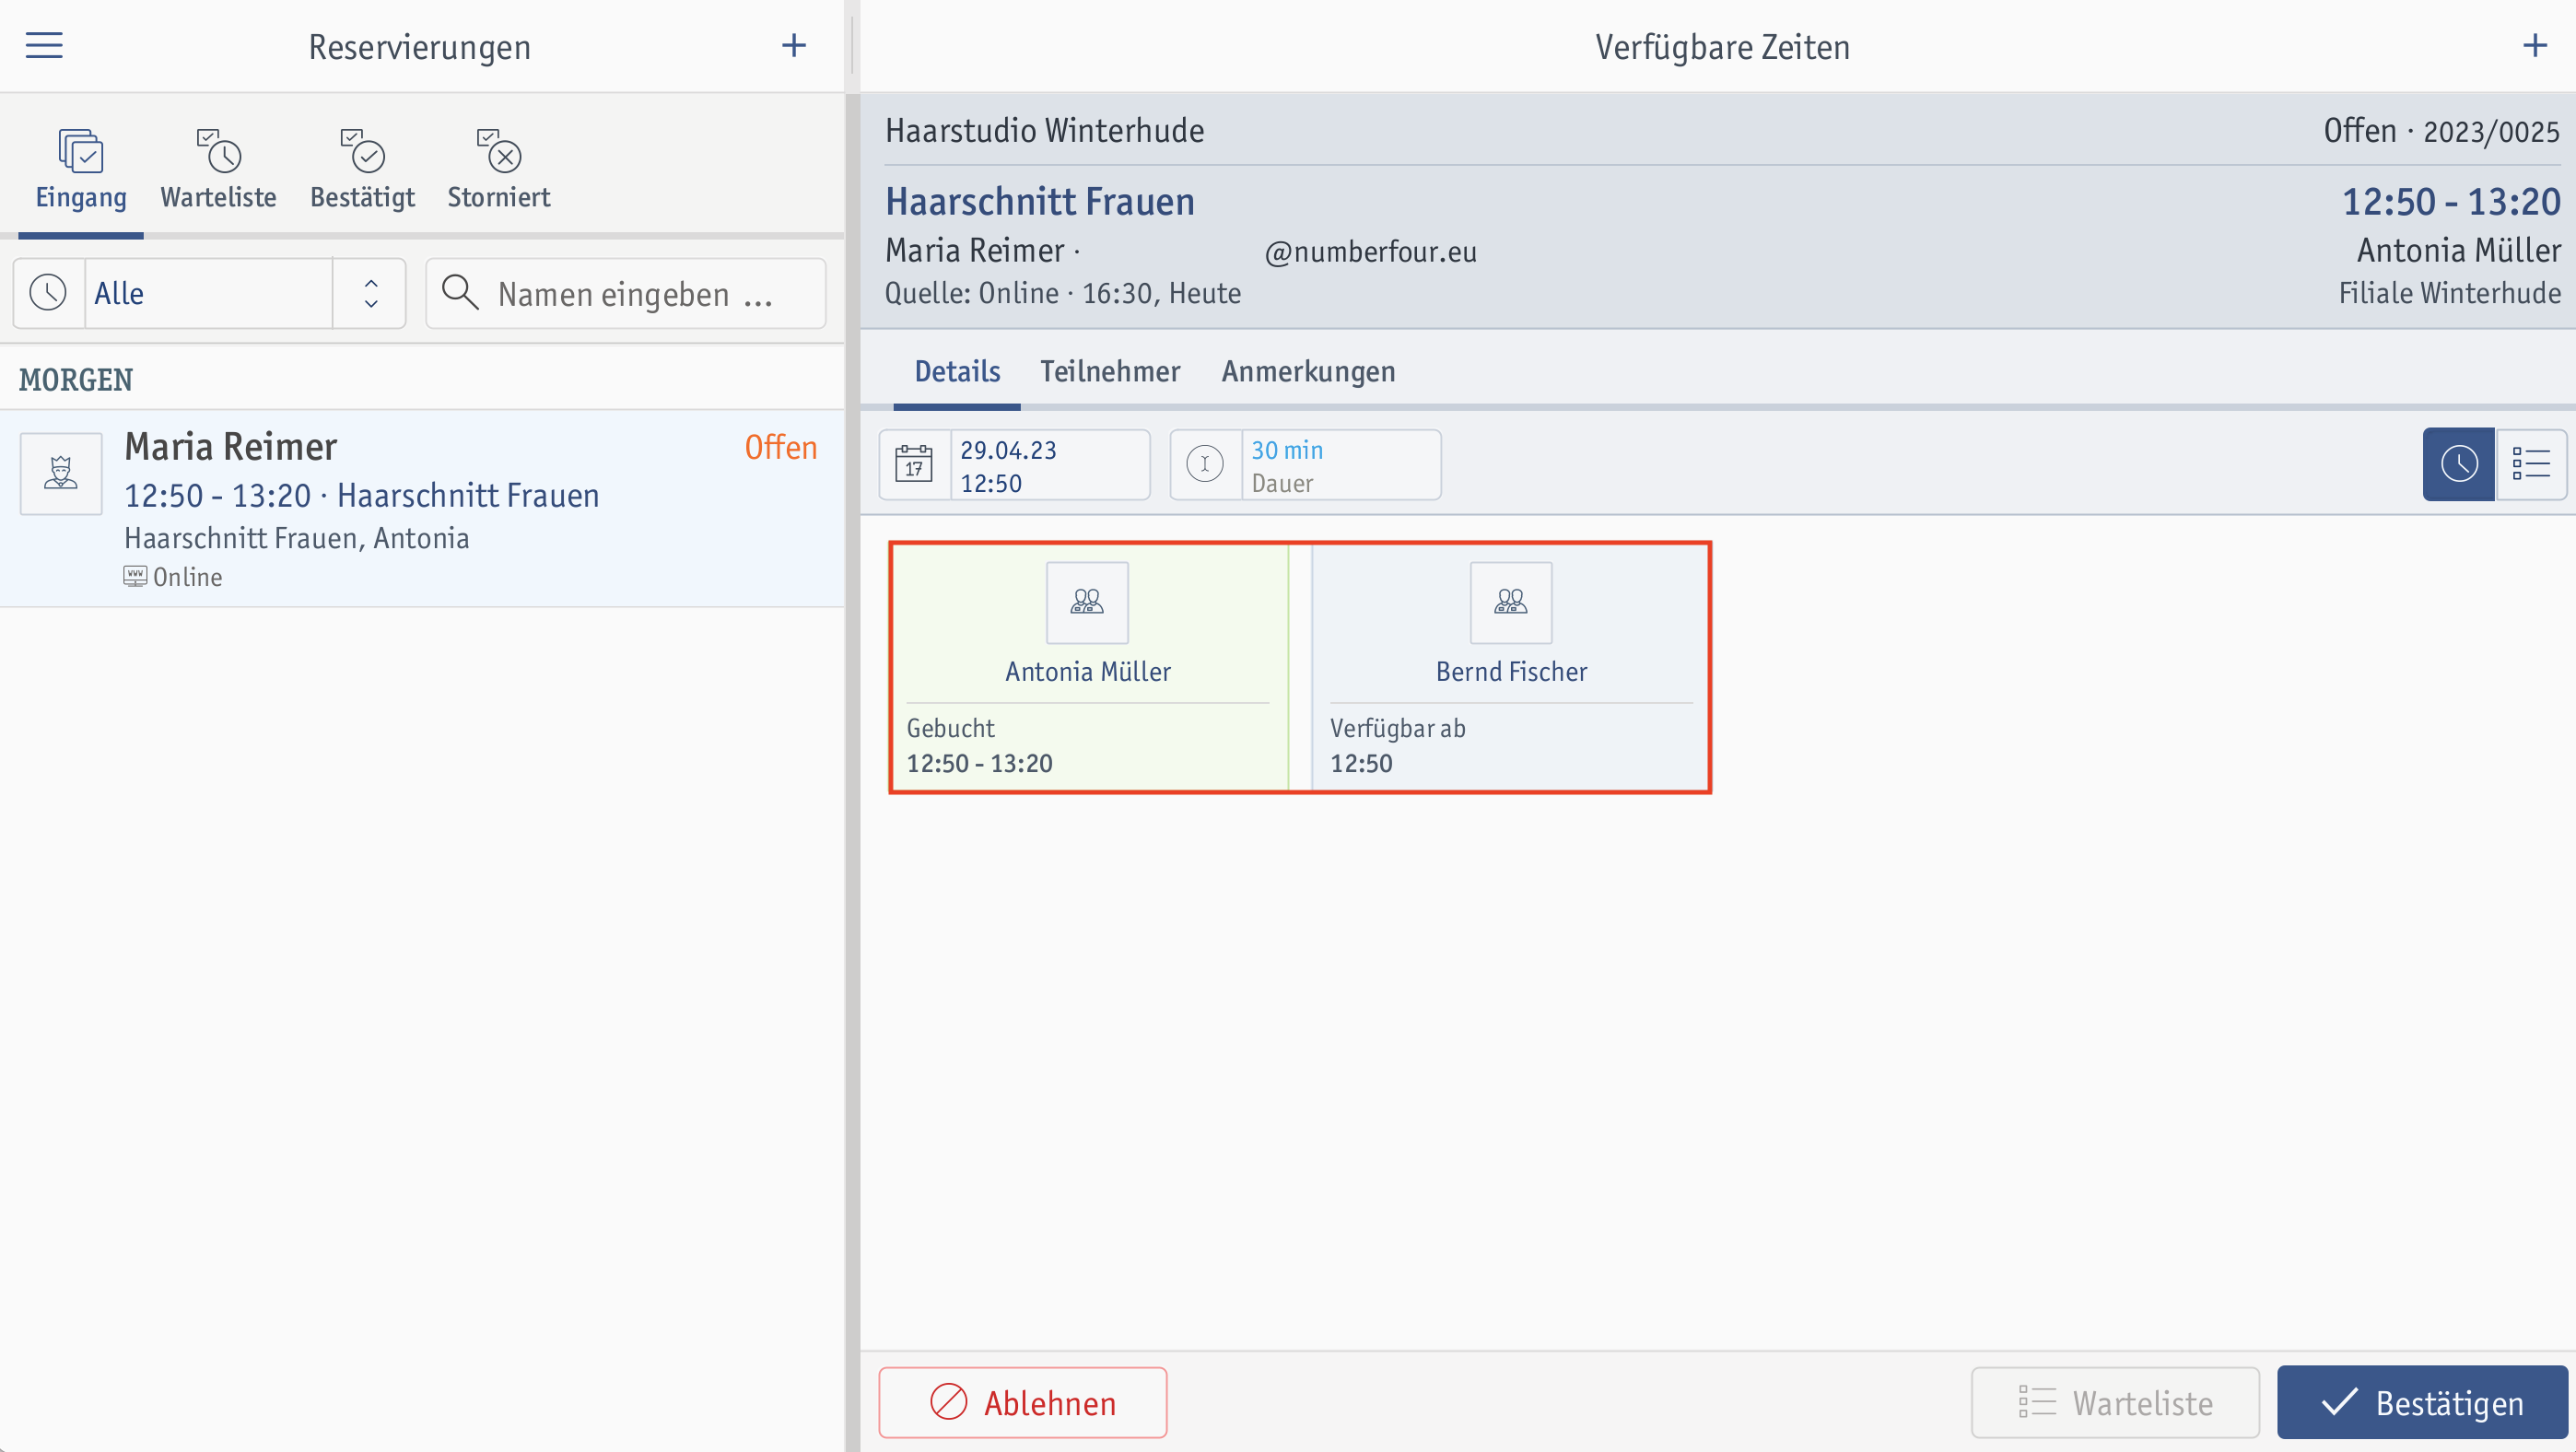
You have a clear view of all reservations, along with suggested available resources, which you can now assign and confirm so that your customers can receive an automatic reservation confirmation via email or SMS.
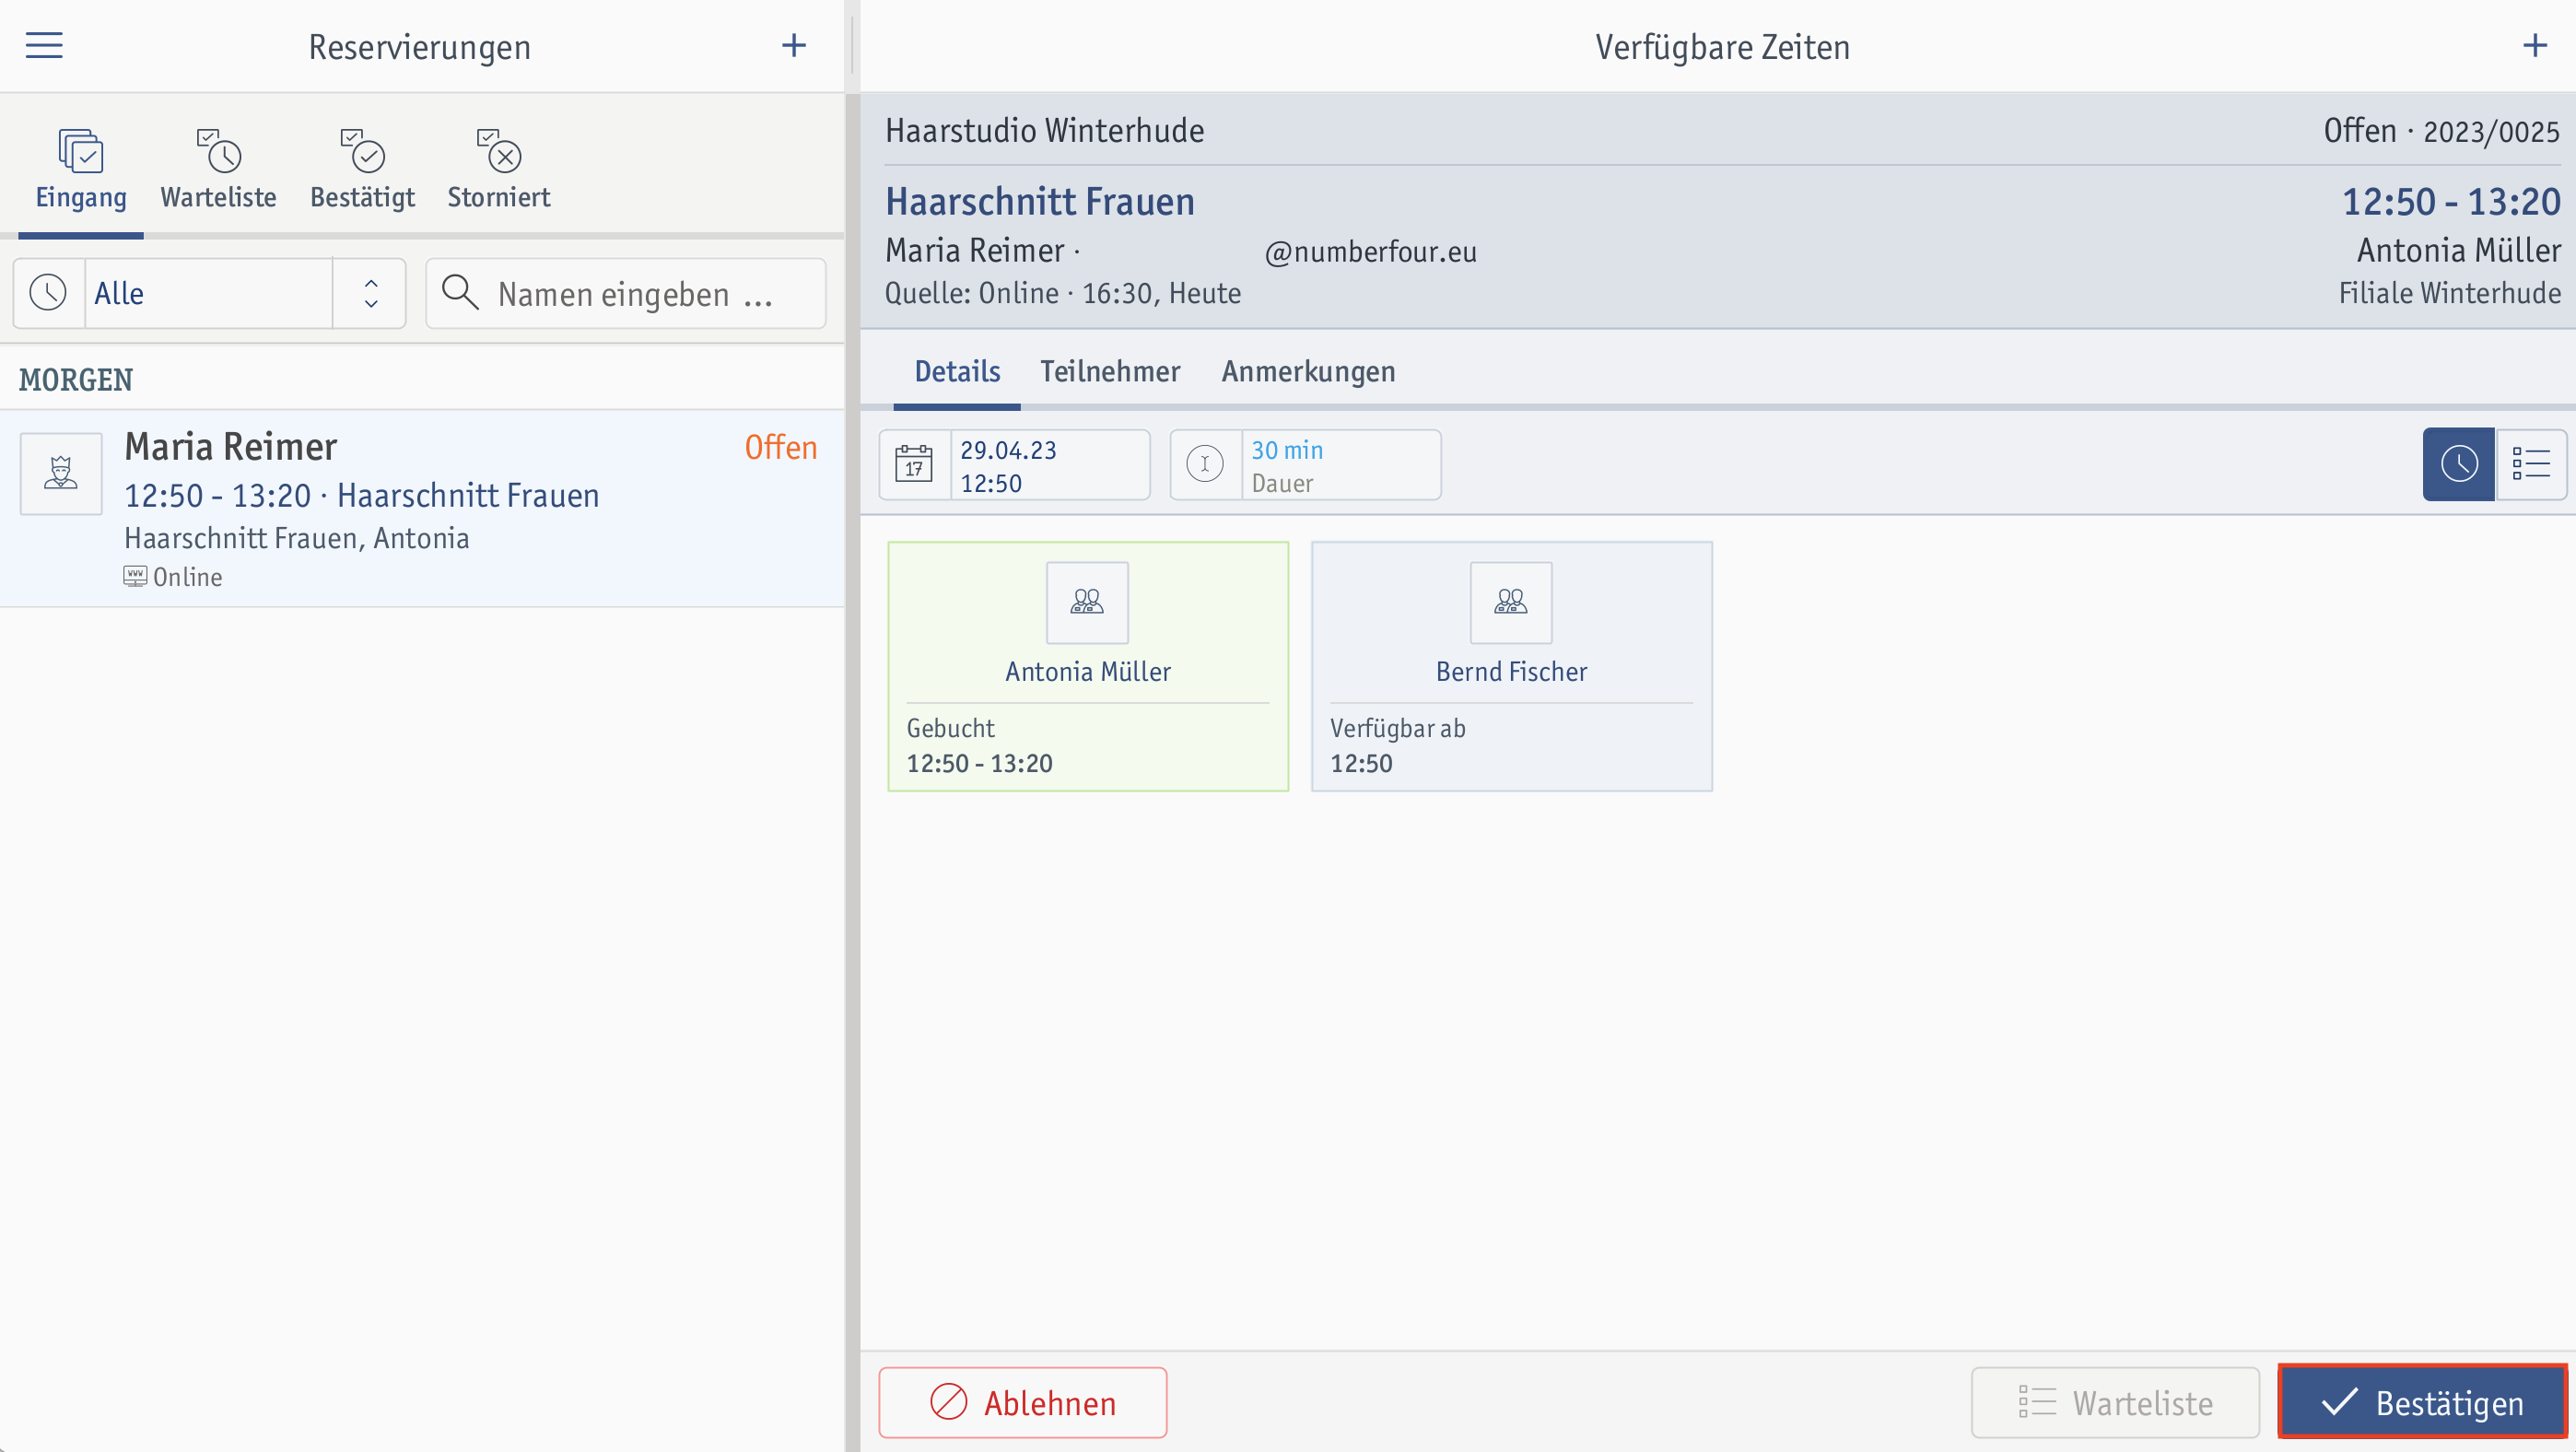 ⮕ After you confirm a reservation, your customer will receive a reservation confirmation.
If you have disabled the Reservation must be confirmed option in the Service Reservation module, and therefore your reservations do not require manual confirmation, these reservations will be displayed in the Confirmed section.
Exempt from this are reservations of new customers. These must always be confirmed manually, even if the Reservation must be confirmed option is deactivated. This function is used to avoid reservations with wrong customer data. After you have once confirmed the reservation of a new customer, further reservations of this customer are automatically accepted and displayed in the Confirmed area.
You have a clear view of all reservations with the assigned staff members. Your customers have already received an automatic reservation confirmation via email or SMS.
If you are not able to realize a certain appointment, you can tap on the reservation and cancel it. Your customer will receive a notification by email or SMS.
When your customer shows up on the day of the reservation, your first step is to check in the reservation. To do this, follow these steps:
Alternatively, you can access the reservation from your reservation calendar and check in from there. You can open the reservation calendar under Reservations > Active Reservations > Calendar overview.
If your customer has arrived but the staff member is not yet free, select the [Arrived] option.
Your customer has received their service and now you want to get the payment for the service? To do this, follow these steps:
Requirement
Alternatively, you can access the reservation from your reservation calendar and check out the reservation from there. You can open the reservation calendar under Reservations > Active reservations > Calendar overview.
Optionally, you can add care products that you presented to your customer during the service to the basket.
You can optionally assign this purchase to a staff member if you have enabled the Assign Staff Member to every sold product option in the POS menu under Sales > Sales Channels > Sales tab.